|
|
||
|---|---|---|
| .final_builds | ||
| ci | ||
| config | ||
| docs/diag | ||
| jobs | ||
| packages | ||
| releases/rabbitmq-forge | ||
| src | ||
| .gitignore | ||
| CONDUCT.md | ||
| CONTRIBUTING.md | ||
| LICENSE | ||
| README.md | ||
README.md
Blacksmith RabbitMQ Forge
This Blacksmith Forge teaches a Blacksmith Broker how to deploy standalone and clustered RabbitMQ service deployments for message bus applications.
Deploying
To deploy this forge, you will need to add it to your existing
Blacksmith Broker manifest deployment, co-locating the
rabbitmq-blacksmith-plans job on the Blacksmith instance group.
Here's an example to get you started (clipped for brevity):
releases:
  - name:    rabbitmq-forge
    version: latest

instance_groups:
  - name: blacksmith
    jobs:
      - name:    rabbitmq-blacksmith-plans
        release: rabbitmq-forge
        properties:
          plans:
            # your plans here
            # (see below)
The RabbitMQ Forge deploys rabbitmq by using jobs that are found
inside the rabbitmq-forge BOSH release, which means that your
Blacksmith BOSH director also needs that release. Blacksmith is
able to upload that release for you, if you want.
For the Spruce users out there:
---
instance_groups:
  - name: blacksmith
    jobs:
      - name: blacksmith
        properties:
          releases:
            - (( append ))
            - (( grab releases.rabbitmq-forge ))
Finally, you'll need to define plans for Blacksmith to deploy. The following sections discuss those ad nauseum.
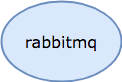
Standalone Topology
The standalone topology is as straightforward as they come: a
singe dedicated VM that runs a single RabbitMQ process, bound on
all interfaces, to port 5672, with a management UI on 15672.
Here's a diagram to clear things up:
Configuration Options
-
vm_type - The name of a BOSH
vm_typefrom your cloud-config. You can use this to size your RabbitMQ appropriate to your workload requirements, in terms of RAM and CPU. Increasing the disk size via the VM type is not going to net you much of a gain (see thedisk_sizeandpersistoptions instead. -
network - The name of the network to deply these instances to. This network should be defined in your cloud-config, and should be large enough to handle your anticipated service footprint. It does not need any static IP addresses.
By default, VMs will be deployed into a network named
rabbitmq-service.
Example Configuration
A single standalone plan:
instance_groups:
  - name: blacksmith
    jobs:
      - name:    rabbitmq-blacksmith-plans
        release: rabbitmq-forge
        properties:
          plans:
            dedicated:
              type: standalone
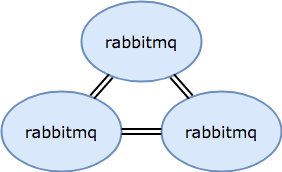
Clustered Topology
The cluster topology scales up the RabbitMQ instances and sets
them up in a message bus cluster, striping across BOSH
availability zones.
Here's a diagram:
Configuration Options
-
vm_type - The name of a BOSH
vm_typefrom your cloud-config. You can use this to size your RabbitMQ appropriate to your workload requirements, in terms of RAM and CPU. -
azs - A list of BOSH availability zone names (per cloud-config), across which to stripe the nodes. By default, nodes will be put in
z1andz2. -
network - The name of the network to deply these instances to. This network should be defined in your cloud-config, and should be large enough to handle your anticipated service footprint. It does not need any static IP addresses.
By default, VMs will be deployed into a network named
rabbitmq-service.
Example Configuration
Here's the configuration for the cluster pictured in the topology digram above:
instance_groups:
  - name: blacksmith
    jobs:
      - name:    rabbitmq-blacksmith-plans
        release: rabbitmq-forge
        properties:
          plans:
            clustered:
              type:      cluster
              instances: 3
Here, we provide two different clustered configurations, one with lots of nodes, and another with very large (per cloud-config) nodes.
instance_groups:
  - name: blacksmith
    jobs:
      - name:    rabbitmq-blacksmith-plans
        release: rabbitmq-forge
        properties:
          plans:
            wide:
              type:      cluster
              instances: 7

            large:
              type:     cluster
              vm_type:  very-large
Service Credentials
The standalone topology returns the following credentials structure, for consumption by Cloud Foundry 12-factor applications:
{
  "dashboard_url" : "http://10.x.x.x:15672/#/login/username/sekrit",
  "host"          : "10.x.x.x",
  "hostname"      : "10.x.x.x",
  "mgmt_port"     : 15672,
  "password"      : "sekrit",
  "protocols"     : {
    "amqp"        : {
    "host"        : "10.x.x.x",
    "password"    : "sekrit",
    "port"        : 5672,
    "uri"         : "amqp://some-user:sekrit@10.x.x.x:5672",
    "username"    : "some-user",
    "vhost"       : "/"
   },
    "management": {
    "host"        : "10.x.x.x",
    "password"    : "sekrit",
    "path"        : "/api",
    "port"        : 15672,
    "ssl"         : false,
    "uri"         : "http://some-user:sekrit@10.x.x.x:15672/api",
    "username"    : "some-user"
   }
  },
  "rmq_port"      : 5672,
  "uri"           : "amqp://some-user:sekrit@10.x.x.x:5672",
  "username"      : "some-user",
  "vhost"         : "/"
}
-
dashboard_url- The URL to access the RabbitMQ management GUI. -
host- The IP address of the standalone RabbitMQ host.hostnameandhostare interchangeable. -
vhost- The name of the virtual host that the user's permissions apply to. -
mgmt_port- The TCP port that the RabbitMQ management web interface can be accessed via. -
rmq_port- The TCP port that RabbitMQ's AMQP interface is bound to and listening for inbound connections on. -
username- The administrator account username. -
password- The administrator account password. -
uri- Anamqp://...URL that can be used for accessing RabbitMQ. It contains all of the other values, in a URL / DSN for easier integration with libraries / SDKs.
The section in the protocols block is to provide Pivotal RabbitMQ equivalent credentials formatting to applications. Please check Pivotal documentation on RMQ Credentials format for more details.
The clustered topology returns the following credentials structure, for consumption by Cloud Foundry 12-factor applications:
{
  "dashboard_url" : "http://10.x.x.x:15672/#/login/username/sekrit",
  "hostname"      : "10.x.x.x",
  "hostnames"     : ["10.x.x.x", "10.x.x.y", "10.x.x.z"],
  "hosts"         : ["10.x.x.x", "10.x.x.y", "10.x.x.z"],
  "mgmt_port"     : 15672,
  "password"      : "sekrit",
  "protocols"     : {
    "amqp"        : {
    "host"        : "10.x.x.x",
    "hosts"       : ["10.x.x.x", "10.x.x.y", "10.x.x.z"],
    "password"    : "sekrit",
    "port"        : 5672,
    "uri"         : "amqp://some-user:sekrit10.x.x.x:5672",
    "uris"        : ["amqp://some-user:sekrit@10.x.x.x:5672",
                     "amqp://some-user:sekrit@10.x.x.y:5672",
                     "amqp://some-user:sekrit@10.x.x.z:5672"]
    "username"    : "some-user",
    "vhost"       : "/"
   },
    "management": {
    "host"        : "10.x.x.x",
    "password"    : "sekrit",
    "path"        : "/api",
    "port"        : 15672,
    "ssl"         : false,
    "uri"         : "http://some-user:sekrit@10.x.x.x:15672/api",
    "uris"        : ["http://some-user:sekrit@10.x.x.x:15672/api",
                     "http://some-user:sekrit@10.x.x.y:15672/api",
                     "http://some-user:sekrit@10.x.x.z:15672/api"]
    "username"    : "some-user"
   }
  },
  "rmq_port"      : 5672,
  "uri"           : "amqp://some-user:sekrit10.x.x.x:5672",
  "username"      : "some-user",
   "vhost"        : "/"
}
-
dashboard_url- The URL to access the RabbitMQ management GUI. -
rmq_port- The TCP port that RabbitMQ's AMQP interface is bound to and listening for inbound connections on. -
mgmt_port- The TCP port that the RabbitMQ management web interface can be accessed via. -
hosts- A list of the IP addresses of all cluster nodes.hostnamesandhostsare interchangeable. -
vhost- The name of the virtual host that the user's permissions apply to. -
username- The administrator account username. -
password- The administrator account password. -
uri- Anamqp://...URL that can be used for accessing the first (arbitrary) cluster node member. This is provided mainly for backwards compatibility with applications that want to upgrade from the standalone topology, but don't (yet) support multiple RMQ URLs. -
uris- A list ofamqp://...URLs that can be used for accessing each cluster node individually. Resilient applications should use this list to failover on node failure.
The section in the protocols block is to provide Pivotal RabbitMQ equivalent credentials formatting to applications. Please check Pivotal documentation on RMQ Credentials format for more details.
Contributing
If you find a bug, please raise a Github Issue first, before submitting a PR.